BBQ North Main

American BBQ for BBQ lovers

  • Smoking
  • Grilling
  • Contact
  • About Us

What Is The Best Way To Judge the Cooking And Holding Temperatures Of Food

August 31, 2020 By admin Leave a Comment

Everyone loves good foods, but can you serve great food without safety requirements? 

Most cooks know that holding food temperature properly is one of the key points to this problem. But what is the best way to judge the cooking and holding temperatures of food? 

Read on, and the following article will show you a satisfactory answer!

Why are Holding Food Temperatures So Important?

what is the best way to judge the cooking and holding temperatures of food quizlet

Many people think holding temperatures of food merely serves the purposes of preserving our meal’s flavor. In fact, this act is more like a critical control point to ensure the food is safe to eat.

If you are a foodaholic who cares much about food safety, then the terms “The temperature danger zone of food” may be no stranger to you. 

This danger zone temperature ranges from 41 to 135 degrees Fahrenheit. Since most bacteria grow rapidly with no sign of stopping between 70 and 125 degrees Fahrenheit, if the food stays in this temperature range for a particular time (more than 2 hours), those nasty little beings will start to take over the food.

The invasion of bacteria can cause food-borne illness, spoil the food, and make it dangerous for consumption. And, the only way to deal with spoiled food is to toss it away or bury it underground. The point is: The meal you worked so hard to prepare is ruined forever!

All things considered, maintaining the proper temperature for holding food and monitoring the holding process is of paramount importance if you plan to keep your food from wandering into the danger zone, and stay safe enough for you to consume.

How Many Ways to Judge the Cooking and Holding Temperatures of Food?

cooking and holding temperatures of food

When it comes to judging the cooking and holding temperatures of food, there are 2 common ways to do this task:

The first option is the old fashion way – using our senses. This might sound rather impractical. But, in daily life, most of us actually use this way to judge the cooking of the food. Either it’s fresh or spoiled, good or bad, we use our eyes and sometimes our hands and nose to suspect. 

However, in some circumstances, like when buying food from the supermarket, there will be a thick layer of food wrap stand between you and the food. You might not be able to work your magic senses.

Let’s say, if judging the cooking and holding temperatures of food is always that easy, no one would ever buy bad food, right? However, that’s not the case.

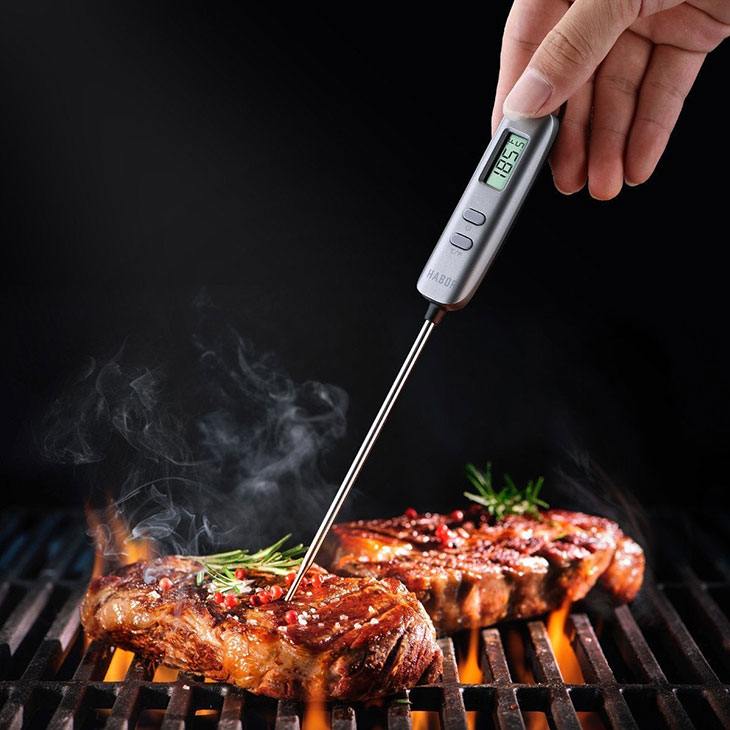
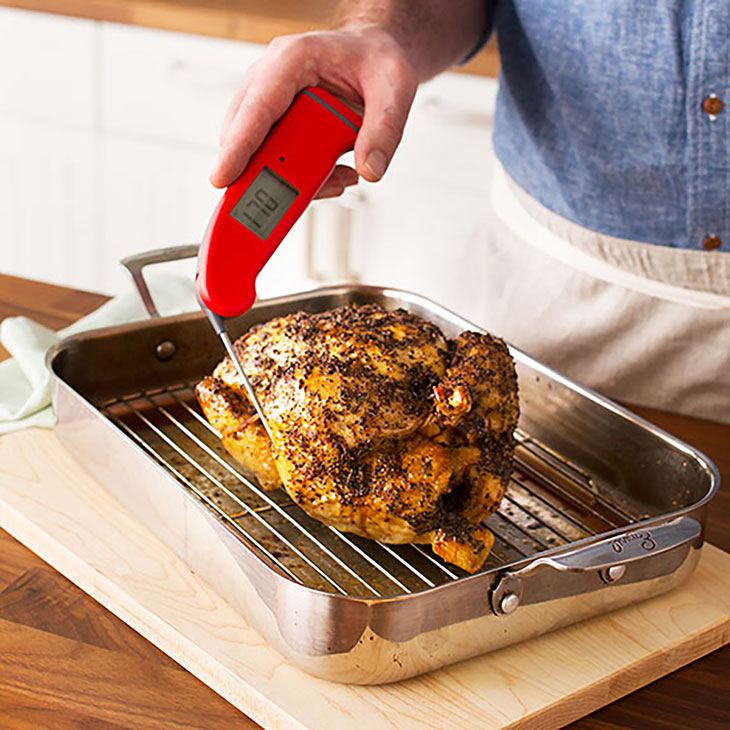
Thanks to the great power of science and our phenomenal scientists, a super handy tool to judge the cooking and exact holding temperatures of food had been born – a Food thermometer. In a nutshell, to tell if the food is safe to eat or best for flavor, the ideal holding temperature before cooking should be maintained. Food thermometers are made explicitly for that. 

There are two types of food thermometers – the analog and the digital thermometer. The difference between the two is the way each type reads temperature. For analog, the temperature is read manually by a dial or by graduation markings. With the digital one, the temperature can be obtained in the drop of a hat, and the value will instantly flash on the screen.

What Are Tips When Holding Food Temperatures?

judge the cooking and holding temperatures of food

There are two key factors for proper food holding temperature: heat and time. If hot food falls below the safe temperature zone or cold food meets a higher temperature than it should, food-borne bacteria is bound to make a comfy home out of it.

Then, as an inevitable outcome, the food will go bad, and food poison will call for you if you do not realize that in time and shovel the whole dish in your mouth.

Need some tips for keeping food in the proper temper zone? Here you go:

To “treat” cold food, you should:

  • Make sure the equipment for this task is functioning well (maintain it at 40 degrees Fahrenheit and below).
  • Do you know bacteria can actually grow on an ice-cold surface? Some sorts of food like fruits, vegetables, and molluscan shellfish allow that to happen, so, never place any of this food directly on ice.
  • Cross-contamination is possible among food. So, always cover the food to prevent it from contaminants. 
  • Your food can still be maintained at its best condition at 40 degrees Fahrenheit and below for up to 6 hours since the moment it is removed from refrigeration.
  • Never let cold food reach 70 degrees Fahrenheit or higher, so please, check the temperature every 2 hours.

For hot food, you should: 

  • Keep in mind that Hot holding equipment is not for reheating or bringing food to a proper temperature. It can only help maintain the hot food temperatures at 140 degrees and above.
  • Covering your food can help conditioning temperatures, and most importantly, keep contaminants out.
  • Stir your food frequently if you are able to. It helps distribute the heat evenly.
  • Often check the food temperatures with a suitable thermometer.
  • By any chance, if you find your food stays colder than 140 degrees for more than 2 hours, it’s time to say buh-bye!
  • Never mix freshly prepared food with leftovers to prevent cross-contamination.

Another tip is food thermometers should be cleaned and disinfected properly both before and after use.

Culinary Tips: How To Tell If Pork Is Done Without A Thermometer?

Final Thoughts! 

Now that we know keeping each type of food in its proper temperature range is important, what is the best way to judge the cooking and holding temperatures of food? The food thermometer is definitely the best way to do that.

I hope this article brought you some useful information. Thank you so much for reading and I’ll see you next time!

Filed Under: Grilling

Culinary Tips: How To Tell If Pork Is Done Without A Thermometer?

August 31, 2020 By admin Leave a Comment

“How to tell if pork is done without a thermometer?” Hmm, quite a tough question, especially when you’ve been compulsively abusing the thermometer as a meticulous cook – who only allows the meat to reach the most perfect and delectable state possible.

We totally agree with you on that matter. A meat thermometer represents the exact evidence you rely on to serve the dish to every picky eater. Not to mention, it only takes a blink to have the answer. Thus, it’s highly recommended that you have a meat thermometer available at your place.

But in case you don’t have a thermometer already, like at a friend’s kitchen, don’t freak out yet, because we are about to unveil five interesting tips for you to improvise. Let’s kick right in!

How Can You Tell If Pork Is Done Without A Thermometer?

culinary tips and tricks

The Finger/palm Technique: Applied for Pan-seared, Grilled, Roasted or Baked Pork Loaf

Perhaps you have heard or seen this test somewhere on Masterchef. It may seem somewhat intuitive, yet literally a rule of thumb for many cooks, so to speak. 

Let us break down the steps first. 

Step 1: Determine the degree of doneness you want your meat to be (raw, medium-cooked, or well-done). 

Step 2: Relax your left hand, palm ahead.

Step 3: Touch the flesh part between your wrist and the other end of the thumb.

If it is as soft as the feel under your right index finger, that is the sign it’s still raw.

Step 4: Begin pressing your thumb against other fingers, alternately, from the index to pinky finger on your left hand, one by one. At the same time, touch the corresponding flesh.

The level of well-cookedness should increase as you proceed to the last finger. They’ll look like these pictures.

And then you have it. Simple as that. Though quite simple to apply, this technique, as we said, is quite intuitive. 

Let’s see what else we can do without a meat thermometer.

Set the Timer for Each Cooking Session

culinary tips and secrets

This technique mainly boils down to experience. We mean, by noticing the time, weight, and internal temperature of the meat cut, you can tell when it is ready to be served.

Remember, the bigger the meat, the lower the heat, and the longer the time.

Typically, it takes 20 minutes for each pound of roast at 375 degrees Fahrenheit to be over with. 

For instance, with pork tenderloin, which often weighs around 1 – 1.5 pounds, this formula also applies. By having it quickly seared on stovetops first, and then set the oven to 375 degrees for 20 minutes, your dish is all good to go.

Here are some of our other recommended timers:

  • Pork sausages: 20 minutes with each side flipped every 10 minutes, and one-inch oil height should be good 
  • Pork chops/steaks:
Pork chops/steaks table

Use a Fork or a Spoon to Determine the Doneness of Your Pork

Step 1: Cut out a small pork cube from the loaf and place it on your cutting board.

Step 2: Check to see if the juices are clear. 

Using a fork and squeezing it against the meat surface, or poking a hole into the meat fibers, you should see some liquids coming out.

If the juices run clear or have a slightly pinkish color, that means your pork is done cooking.

If otherwise, which means the juices are not really clear, continue cooking and repeat that process later.

Use a Knife/Skewer

culinary school tips and tricks

Step 1: Grab a long knife/ skewer and use its tip to pierce a small cut into the meat.

Step 2: Assess the resistance required for that sear.

If your knife/ skewer slides back and forth easily, the inner flesh part has become tender, thus ready to be served.

But if otherwise, you still find it somewhat difficult to make the puncture because something is stuck inside. This indicates that the meat is not entirely cooked through. Thus, try again after a few minutes.

Also, keep in mind the fact that overcooked pork is still better than undercooked one, since the latter may contain harmful bacteria or parasites, the consumption of which would disrupt your digestive system.

Best Electric Smoker Under 200

Final Words

We believe you have wrapped your mind well around the question of “How to tell if pork is done without a thermometer?”, haven’t you? Though seemingly easy, after all, these tips are quite empirical and require an amount of time to master.

Thus, if possible, we still suggest you invest in an instant meat thermometer. It’ll certainly save you from any worries and hassles. Not to mention, it’s inexpensive and can be used for a long time. Definitely worth it! 

But for now, good luck with your cooking experience!

Filed Under: Grilling

8 Primal Cuts of Beef

July 8, 2019 By admin Leave a Comment

We all know that there are different cuts of beef, but we are getting confused about which cuts to purchase, and what cuts are best for the dish that you are thinking about making.

And, besides the different cuts, you also need to know how to select the best quality beef as well.

This is why this guide is so important. Here, you are going to get to know the 8 primal cuts of beef, and you are going to learn how to find the best quality beef cuts.

Making purchasing beef a lot easier next time.

The 8 Primal Cuts of Beef That You Can Purchase

what are the 8 primal cuts of beef

In order for you to know what cut to purchase, you need to know the 8 primal beef cuts that you can choose from. This will give you a better understanding of the cut that you actually need.

1. Chuck

Chuck comes from the shoulder of the cow. This is the tougher part of the cow. So, the meat won’t be soft and tender. However, this is flavorful cuts that can make a large variety of different meat.

The butcher can cut the chuck into the following: Flat-iron steak, chuck short ribs, shoulder tender medallions, chuck pot roast, blade roast, boneless chuck short ribs, stew meat, country style ribs, and top blade steak. All these from just the chuck cut.

2. Brisket

The Brisket came from the steer’s breast. It is also tough meat and has a lot of fat. Not ideal for people that are looking for lean meat. Can be delicious with a marinade, brine and when tenderized. Also great for cooking in a slow cooker.

3. Shanks

cuts of beef steak

The shanks are coming from the forearm of the cow, just in front of the brisket. This is the toughest part of the cuts and needs a lot of preparation in order to make a delicious meal. Normally used for cooking hours like in stews and soups. This is also the cheaper cuts that you can find.

4. Ribs

Ribs are cutting from the ribs and backbone. This is one of the most popular cuts that you can find. From the ribs, there are a couple of cuts that can be cut: Delmonico steak, boneless ribeye roast, cowboy steak, ribeye steaks, and beef short ribs

5. Plate or short plate

Cut from the short rib. Fattier than the rib cuts and also a lot more flavor. Cuts that you can get from the plate are fajitas, pastrami, skirt steak, Philadelphia steak, and short ribs.

6. Loin

This is where the most expensive cuts from the cow come from. Cuts that you can get from the loin are, short loin is filet mignon, tenderloin steak, T-bone, Porterhouse steaks, strip steak, New York Strip, and KC Strip. This is popular cuts that people are always looking for.

How to Smoke a Pork Loin

7. Round

This is the lean and inexpensive cuts from a cow. The round cuts come from the rump and hind legs and can be tough if not cooked correctly. Cuts that you can find with the round cut are round steak, the eye of round, tip steak, tip roast, top round, and bottom round roasts.

8. Flank

The flank cut is below the loin. There isn’t any bone in the flank. Also, quite tough, but known as lean meat. Starting to get popular among healthy eaters.

Things to Look for When Purchasing Your Beef Cuts

8 wholesale cuts of beef

When you are purchasing your beef cuts, you should not only know the different cuts, but you should also make sure that you know how to identify quality grade meats. With these tips, you will also know what to look for, when buying any beef cut.

  1. How cold is the beef that you are purchasing? The colder it is, the better it will be. If the meat isn’t cold enough, there is a chance that the meat might not be as fresh as you would like it anymore.
  2. The color of the beef. It needs to be bright red. The brighter the color, the fresher the meat will be
  3. Looking at the sell-by date as well. The later the sell-by date, the fresher the meat will be.
  4. How does the other meat around it look like? If these meats aren’t fresh, it might contaminate the fresh meat. And, you will not get fresh, meat that won’t make you sick.

If you don’t know the different beef cuts, and you can’t always remember what cut is the best to buy, then you aren’t the only one. This is something that many people are struggling with.

With this guide, you will be able to understand the different cuts a little better. And, you will know what to look for, when you are purchasing beef cuts, and you are looking for fresh cuts.

We want to get value for money, and therefore we need to know what we are purchasing in the first place.

Filed Under: Grilling

Recent Posts

  • What Is The Best Way To Judge the Cooking And Holding Temperatures Of Food
  • Culinary Tips: How To Tell If Pork Is Done Without A Thermometer?
  • Best Electric Smoker Under 200
  • 8 Primal Cuts of Beef
  • How to Smoke a Pork Loin

Categories

  • Grilling
  • Smoking

Copyright © 2023 · BBQ North Main